Spring 일지 #48 (20211005) 일괄 추가1-1
48. 일괄 추가1-1
-일괄 추가 방법 1
* entity 추가(Item.java)

* 테이블, 시퀀스, 변수명 등록(Item.java)
package com.example.entity;
import java.util.Date;
import javax.persistence.Column;
import javax.persistence.Entity;
import javax.persistence.FetchType;
import javax.persistence.GeneratedValue;
import javax.persistence.GenerationType;
import javax.persistence.Id;
import javax.persistence.JoinColumn;
import javax.persistence.Lob;
import javax.persistence.ManyToOne;
import javax.persistence.SequenceGenerator;
import javax.persistence.Table;
import org.hibernate.annotations.CreationTimestamp;
import lombok.Getter;
import lombok.NoArgsConstructor;
import lombok.Setter;
@Entity
@Getter
@Setter
@NoArgsConstructor
@Table(name = "ITEM")
@SequenceGenerator(name = "SEQ_ITEM_NO", sequenceName = "SEQ_ITEM_NO", allocationSize = 1, initialValue = 1)
public class Item {
@Id
@Column(name = "NO")
@GeneratedValue(strategy = GenerationType.SEQUENCE, generator = "SEQ_ITEM_NO")
private Long no;
@Column(name = "NAME")
private String name;
@Lob
@Column(name = "CONTENT")
private String content;
@Column(name = "PRICE")
private Long price;
@Column(name = "QUANTITY")
private Long quantity;
@CreationTimestamp
@Column(name = "REGDATE")
private Date regdate;
@ManyToOne(fetch = FetchType.EAGER)
@JoinColumn(name = "SELLER_ID")
private Member member;
}
* 저장소 생성(ItemRepository)

import com.example.entity.Item;
import org.springframework.data.jpa.repository.JpaRepository;
import org.springframework.stereotype.Repository;
@Repository
public interface ItemRepository extends JpaRepository<Item, Long> {
}
*서비스 생성(ItemServiceImpl.java)
*인터페이스는 따로 만들지 않지만 Impl 을 붙여서 만든다.

package com.example.service;
import javax.persistence.EntityManagerFactory;
import com.example.repository.ItemRepository;
import org.springframework.beans.factory.annotation.Autowired;
import org.springframework.stereotype.Service;
@Service
public class ItemServiceImpl {
@Autowired
ItemRepository iRepository;
@Autowired
EntityManagerFactory emf;
}
*컨트롤러 생성(SellerController.java)
*코드 작성 시 항상 오타에 주의하자.
* @RequestParam 을 사용했으므로 포스트맨에서 form-data를 사용한다.

package com.example.controller;
import java.util.ArrayList;
import java.util.HashMap;
import java.util.List;
import java.util.Map;
import com.example.entity.Item;
import com.example.entity.Member;
import com.example.jwt.JwtUtil;
import com.example.service.ItemServiceImpl;
import com.example.service.MemberService;
import org.springframework.beans.factory.annotation.Autowired;
import org.springframework.http.MediaType;
import org.springframework.web.bind.annotation.RequestHeader;
import org.springframework.web.bind.annotation.RequestMapping;
import org.springframework.web.bind.annotation.RequestMethod;
import org.springframework.web.bind.annotation.RequestParam;
import org.springframework.web.bind.annotation.RestController;
@RestController
@RequestMapping(value = "/api")
public class SellerController {
@Autowired
MemberService mService;
@Autowired
ItemServiceImpl iService;
@Autowired
JwtUtil jwtUtil;
// 127.0.0.1:8080/REST/api/seller/item_insert
// {name:'a'}
@RequestMapping(value = "/seller/item_insert", method = {
RequestMethod.POST }, consumes = MediaType.ALL_VALUE, produces = MediaType.APPLICATION_JSON_VALUE)
// [{"name":,"content":, "price": "quantity":}, { }, { }]
public Map<String, Object> itemInsertPOST(@RequestParam("name") String[] name,
@RequestParam("content") String[] content, @RequestParam("price") Long[] price,
@RequestParam("quantity") Long[] quantity, @RequestHeader("token") String token) {
Map<String, Object> map = new HashMap<>();
try {
// 판매자 이메일 가져오기
String email = jwtUtil.extractUsername(token);
// 위에서 받은 값을 list로 변환
List<Item> list = new ArrayList<>();
for (int i = 0; i < name.length; i++) {
Item item = new Item();
item.setName(name[i]);
item.setContent(content[i]);
item.setPrice(price[i]);
item.setQuantity(quantity[i]);
Member member = mService.getMemberOne(email);
item.setMember(member);
list.add(item);
}
// 일괄추가
iService.insertBatch(list); //방법 1
map.put("status", 200);
} catch (Exception e) {
// e.printStackTrace();
map.put("status", hashCode());
}
return map;
}
}
*서비스(insertBatch) 추가(ItemServiceImpl.java)
... ...
// 일괄등록 방법1
public void insertBatch(List<Item> list) {
iRepository.saveAll(list);
}
*일괄 추가1
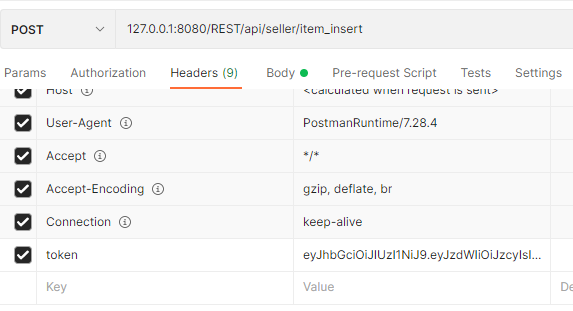
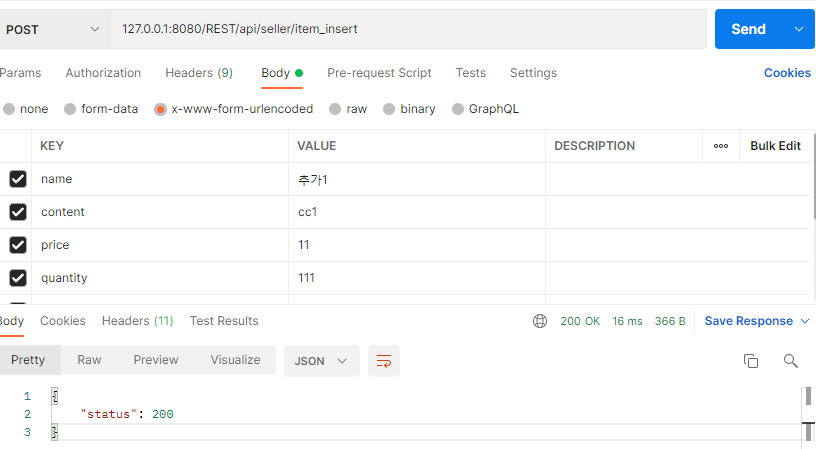
*로그인 후 토큰을 생성 후 추가 해야한다.
*컨트롤러에서 @RequestParam 을 사용했으므로 포스트맨에서 form-data를 사용한다.
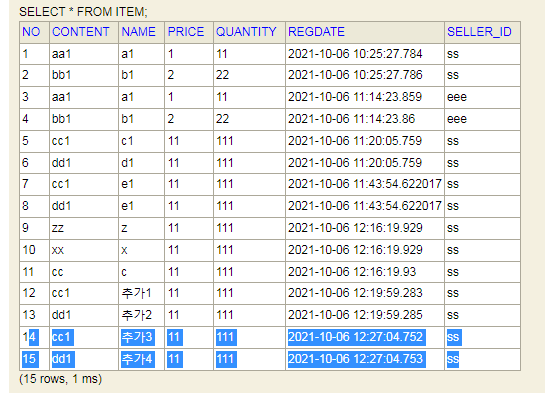
*추가 후 h2-console에서 확인한다.


-일괄추가 방법2
*서비스(insertBatch1) 추가(ItemServiceImpl.java)
// 일괄등록 방법2
public void insertBatch1(List<Item> list) {
EntityManager em = emf.createEntityManager();
em.getTransaction().begin(); // 트랜젝션 시작
for (Item item : list) {
em.persist(item);
}
// commit(적용) or rollback(되돌리기)
em.getTransaction().commit();
}
* insertBatch1 추가(SellerController.java)
... ...
package com.example.controller;
import java.util.ArrayList;
import java.util.HashMap;
import java.util.List;
import java.util.Map;
import com.example.entity.Item;
import com.example.entity.Member;
import com.example.jwt.JwtUtil;
import com.example.service.ItemServiceImpl;
import com.example.service.MemberService;
import org.springframework.beans.factory.annotation.Autowired;
import org.springframework.http.MediaType;
import org.springframework.web.bind.annotation.RequestBody;
import org.springframework.web.bind.annotation.RequestHeader;
import org.springframework.web.bind.annotation.RequestMapping;
import org.springframework.web.bind.annotation.RequestMethod;
import org.springframework.web.bind.annotation.RequestParam;
import org.springframework.web.bind.annotation.RestController;
@RestController
@RequestMapping(value = "/api")
public class SellerController {
@Autowired
MemberService mService;
@Autowired
ItemServiceImpl iService;
@Autowired
JwtUtil jwtUtil;
// 127.0.0.1:8080/REST/api/seller/item_insert
// {name:'a'}
@RequestMapping(value = "/seller/item_insert", method = {
RequestMethod.POST }, consumes = MediaType.ALL_VALUE, produces = MediaType.APPLICATION_JSON_VALUE)
// [{"name":,"content":, "price": "quantity":}, { }, { }]
public Map<String, Object> itemInsertPOST(@RequestParam("name") String[] name,
@RequestParam("content") String[] content, @RequestParam("price") Long[] price,
@RequestParam("quantity") Long[] quantity, @RequestHeader("token") String token) {
Map<String, Object> map = new HashMap<>();
try {
// 판매자 이메일 가져오기
String email = jwtUtil.extractUsername(token);
// 위에서 받은 값을 list로 변환
List<Item> list = new ArrayList<>();
for (int i = 0; i < name.length; i++) {
Item item = new Item();
item.setName(name[i]);
item.setContent(content[i]);
item.setPrice(price[i]);
item.setQuantity(quantity[i]);
Member member = mService.getMemberOne(email);
item.setMember(member);
list.add(item);
}
// 일괄추가
//iService.insertBatch(list); // 방법 1
iService.insertBatch1(list); // 방법 2
map.put("status", 200);
} catch (Exception e) {
// e.printStackTrace();
map.put("status", hashCode());
}
return map;
}
}
... ...
*일괄 추가2

DML 은 4가지가 있다.
추가 삭제 수정을 여러 개를 동시에 할 때 반복문을 사용하면 중간에 정지 되면 안되므로 트랜젝션 시작을 이용해 한번에 모든 작업이 이루어 지도록 한다.